
This morning went fabulous, we are settling into our new school time schedule and Kaitlyn was so eager to start her first day! We started at 9:20 when she woke up with some apple oatmeal to get us ready to start learning. I know everyone has been at school for at least an hour or two by then, but at my school we value our morning sleepy time. It's awesome I'm actually on time :)
We jumped right in to our activities today, It felt like I was right back in my classroom...just with a much smaller audience!
Working with Kaitlyn reminds me of all the things I love about teaching. The creativity, the hands on activities the light bulb moments when they finally get what you have been repeating 700 times.
Two things I took away from today.....
I miss the actual purity of teaching. When you taught what your students needed to know, in a way they could understand because they needed it, not just because it was what came next in your teacher manual. In today's classrooms the purity of teaching is hard to find. It's been buried and hidden amongst the endless to do's, the "essential" data driven programs and the suffocating paperwork. But if you look hard teachers still have that glimmer deep inside that still exists. I just wish as a society we could have enough faith in them to allow them to do what they were born to do....teach.
Today's projects also reminded me of one more thing, the definite separation of primary vs intermediate teachers, I can definitely testify having been both . The separation and difference can be summed up in two words paint and glitter. Primary teachers love getting their hands messy and don't mind a little glitter on the floor, Intermediate teachers on the other hand start twitching when they see projects that list paint and glitter as their two main supplies. You can tell by the following activities, and run on sentences that I am DEFINITELY a Primary teacher!
So roll up your sleeves and get a little messy with your little ones....
While Kaitlyn ate her breakfast she went through her alphabet and color books (I found these in teh dollar section at my local Target) using a pointer. I would ask her to point to objects, colors, letters etc. Great warm up activity to get her started. We talked about the letter A and I pointed it out in her books.

After breakfast was over Kaitlyn started her first activity. We made a sticker book with her name on it. I used some left over scrapbook paper cut to 5X7 had hr choose 4 pieces and then hole punched the sides attaching ribbon through each hole to make it like a book. I had her hunt for the letters on her sticker sheet (another Target find) to make her name on the front. I will use this sticker book as positive behavior reinforcement throughout our lessons. Each time she tries really hard or completes as task correctly or other desired behavior I will let her pick a sticker to put in her sticker book. As the holidays come closer we will make new sticker books and I will get different stickers for her to choose from. I have found in the classroom that this is a great motivational tool for young ones :)We jumped right in to our activities today, It felt like I was right back in my classroom...just with a much smaller audience!
Working with Kaitlyn reminds me of all the things I love about teaching. The creativity, the hands on activities the light bulb moments when they finally get what you have been repeating 700 times.
Two things I took away from today.....
I miss the actual purity of teaching. When you taught what your students needed to know, in a way they could understand because they needed it, not just because it was what came next in your teacher manual. In today's classrooms the purity of teaching is hard to find. It's been buried and hidden amongst the endless to do's, the "essential" data driven programs and the suffocating paperwork. But if you look hard teachers still have that glimmer deep inside that still exists. I just wish as a society we could have enough faith in them to allow them to do what they were born to do....teach.
Today's projects also reminded me of one more thing, the definite separation of primary vs intermediate teachers, I can definitely testify having been both . The separation and difference can be summed up in two words paint and glitter. Primary teachers love getting their hands messy and don't mind a little glitter on the floor, Intermediate teachers on the other hand start twitching when they see projects that list paint and glitter as their two main supplies. You can tell by the following activities, and run on sentences that I am DEFINITELY a Primary teacher!
So roll up your sleeves and get a little messy with your little ones....
Here was our First Day!
While Kaitlyn ate her breakfast she went through her alphabet and color books (I found these in teh dollar section at my local Target) using a pointer. I would ask her to point to objects, colors, letters etc. Great warm up activity to get her started. We talked about the letter A and I pointed it out in her books.


After we finished reading our apple book we worked on our 4 seasons project.
First (Step 1) I put some blue paint on a piece of white construction paper. Kaitlyn used her hands to spread it around the whole paper. (Step 2) After it dried I painted her hand and forearm brown. I placed it onto the blue paper 4 times making 4 trees. (Step 3)For the first tree we added cotton balls for snow (Winter), for the second tree she used her fingerprints in green paint to make spring leaves. we added small balls of pink tissue paper for apple blossoms (Spring) For the third tree she used two colors of green for the summer leaves and the used red thumbprints for the apples. (Summer) For the last tree she used red, orange and yellow paint to add the fall leaves using her fingerprints (Fall) When she was all done we reviewed the seasons and I wrote them on her paper.

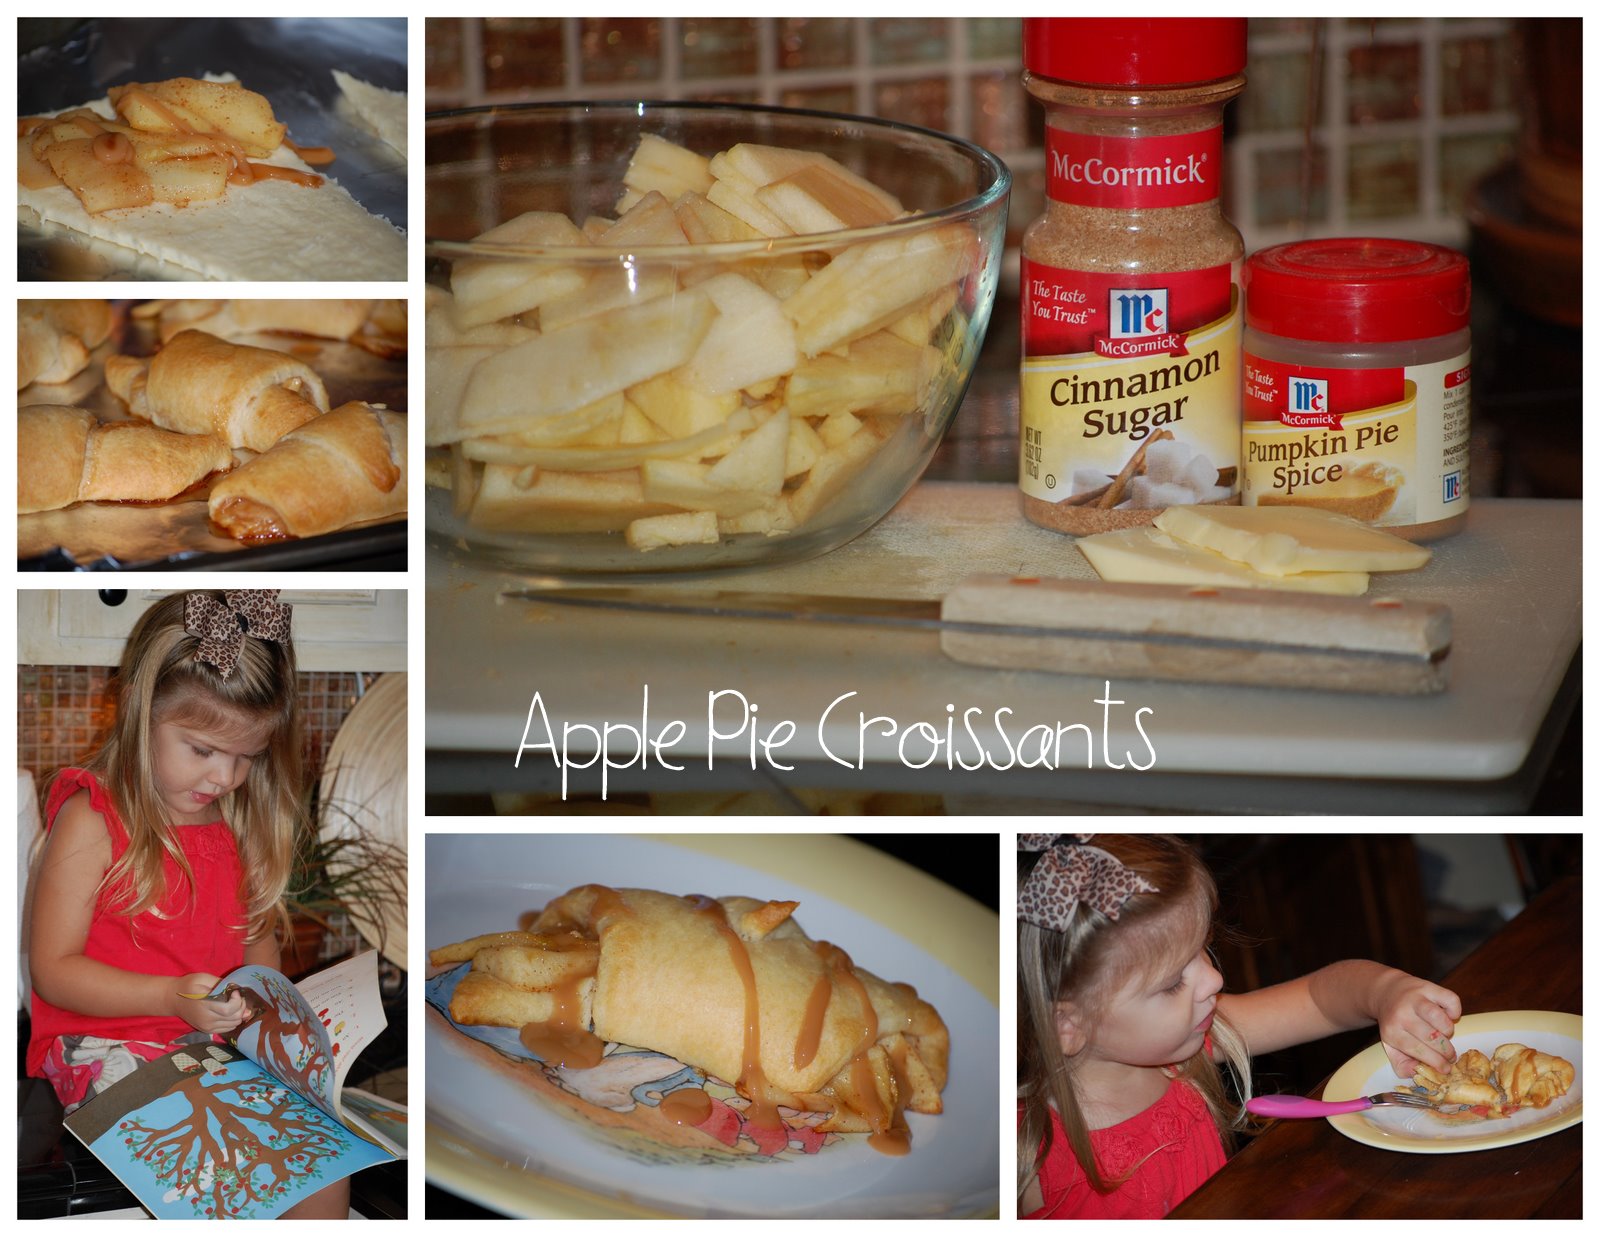
For our cooking activity today we made Apple Croissants....they were fabulous! Kaitlyn and I cut open the apples and looked inside counting the seeds we found and naming the parts of the apple. I sliced them very thin and added them to some butter (2 TBS) and a few sprinkles of cinnamon sugar and pumpkin pie spices in a sauce pan on the stove. I heated them until they were soft. I unrolled the Pillsbury croissants onto a baking sheet added a few of the apples and then rolled them up...Baked till golden and bubbly about 15 min. when we took them out Kaitlyn drizzled some caramel on them....they were oh so yummy!
I hope everyone had a great first day back at school wherever your classroom might be, and I hope that you find these little lessons that we are learning to be helpful.


